It is easier then you think with an HP Printer to scan to a computer.
Uploading pictures or documents on your computer might seem like a confusing task at first. However, it’s much easier than you think, especially if you have a reputable printer brand like HP.
In today’s article, we’ll show you how to perform an HP printer scan to a computer in a step by step guide using various methods, so you can find the one that works best for you. Let’s jump right in!
If you are need to know how to scan to a computer with a Canon Printer, click the link.
Contents
Can All HP Printers Scan to Computer?
The short answer here is no. It’s a common misconception that all HP printers come ready with a built-in scanner. However, most modern HP printers will have this feature. In other words, your printer will most likely have a scanning feature, but not necessarily.
The easiest way to know whether your printer can also scan is by checking the printer’s manual or visiting the products section on HP’s website and checking whether your printer model supports scanning.
However, if your printer does have scanning features, this guide should apply to your printer regardless of its model, as all printer scanners will work the same way.
How to Scan to Computer with an HP Printer Using HP Smart App:
To avoid driver and compatibility problems, HP released a new Computer App called “HP Smart App”, which allows you to manage all your printer’s features easily, including scanning. Here’s how to use this app to scan to your computer:
Step 1: Download and Install HP Smart App on Your Computer
First, you should start by downloading the HP Smart App on your computer by clicking here. This applies to PC and macOS.
Choose your printer model (found easily on the printer model label) and follow the instructions to download and install the app on your computer. If your model isn’t listed, you can download the app manually by clicking here.
Step 2: Prepare the Document for Scanning
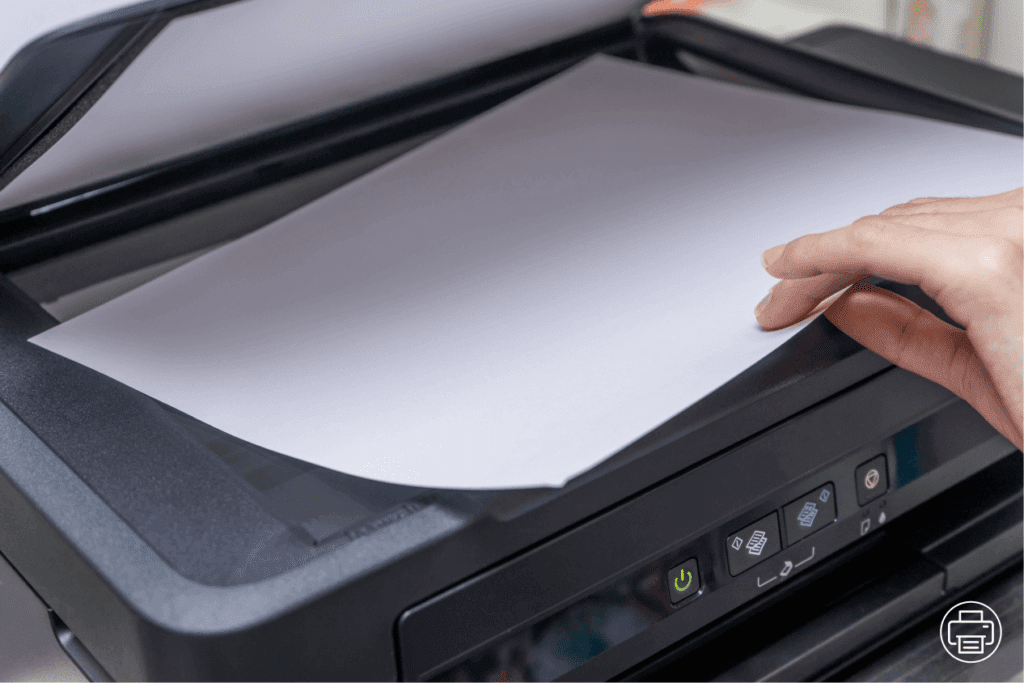
With everything ready, put the document or photo you want to scan on the glass scanner area of the printer. The side you want to scan should be facing down.
You should also make sure to align the file properly so that all the edges are touching the side of the printer with arrows on them.
Step 3: Click “Scan” on the Smart App
Turn your printer on and connect it to your computer, then launch the HP Smart App. The app will automatically recognize your printer and install any drivers for operating if necessary.
On the Smart App window, you’ll find multiple options to choose from. Choose your printer model then click on the “Scan” box to proceed.
Step 4: Modify the Settings of the Document Before Scanning
After clicking scan, you’ll be prompted to the adjustment tab where you can optimize your document before scanning.
Here, you can adjust various settings, such as resolution, scanning source, page size, scanned part, etc.
Step 5: Finalize and Save the Image with the Preview Feature
At the bottom right, you’ll find the “Scan” and “Preview” buttons. When you’re satisfied with the settings, click on “Scan”.
The app will then show you a preview of what the file will look like when it’s scanned with various options to edit the scanned file. To edit the file, click on the button at the top right of the document.
There you can crop the scanned file, add filters, and even choose whether to save it as an image or as a PDF file. Click save and store the scanned file where you want it to be.
How to Scan Without HP Smart App (Manually):
If you can’t install the HP Smart App on your computer, you can still get the job done using conventional methods. Here’s a brief guide on how to scan to a computer using regular Windows features.
Step 1: Make Sure All HP Printer Drivers Are Installed
Before you start you need to make sure that all your printer drivers are installed. Luckily, your computer should do that automatically.
However, if your computer can’t install them, use the CD that comes with the printer to install them.
Step 2: Prepare the Document for Scanning
With everything ready, put the document or photo you want to scan on the glass scanner area of the printer. The side you want to scan should be facing down.
You should also make sure to align the file properly so that all the edges are touching the side of the printer with arrows on them.
Step 3(A): Find “Fax and Scan” on Your Computer
From here you have two methods to scan a file. The first one is by typing “ windows fax and scan” in the search bar, and clicking on the first result.
Click on the “New Scan” from the top left corner in the opened window, then choose your printer model and press “Ok”.
Step 3(B): Find Devices and Printers on Your Computer
Alternatively, you can type “devices and printers” in the search bar, and click on the first result. There you’ll find your printer among other devices connected to the computer. Right click on your printer and choose “Start scan”.
Step 4: Adjust Any Settings Before Scanning
Whether you choose “Fax and Scan” or “Devices and Printers”, you’ll be prompted to the same page that enables you to adjust the settings of the file before scanning.
These settings include profile, source, paper size, file type, color format, resolution, brightness, and contrast.
Step 5: Start Scanning
Once you’re satisfied with the setting of the scanned file, you can click on “Scan” to start scanning. However, you can also click “Preview” to see whether your scan is adequately positioned.
An “Import Pictures or Videos” will appear if you’re saving the scanned file as a photo, simply click “next” and “Import” to proceed, or “more options” if you want to change the destination folder of your file.
Wrap Up
There you have it! A brief guide with everything you need to know about HP Printer Scanner and how to scan to computers using them.
As you can see, there are different methods that you can use to get the job done. However, you always need to download the latest drivers for your printer so that it works properly.